Nail designs and art have made a huge comeback over the past few years. Perhaps the most popular types are nail art designs that one can easily prepare when at home. With the correct manicure set and tools, anyone can become a professional nail artist.
Performing your DIY nail art is a simple process, and an excellent way of saving money. Plus, there is also a therapeutic aspect to applying nail art designs. The types we have on this list include loose glitter, press on foils, nail art stickers and various others.
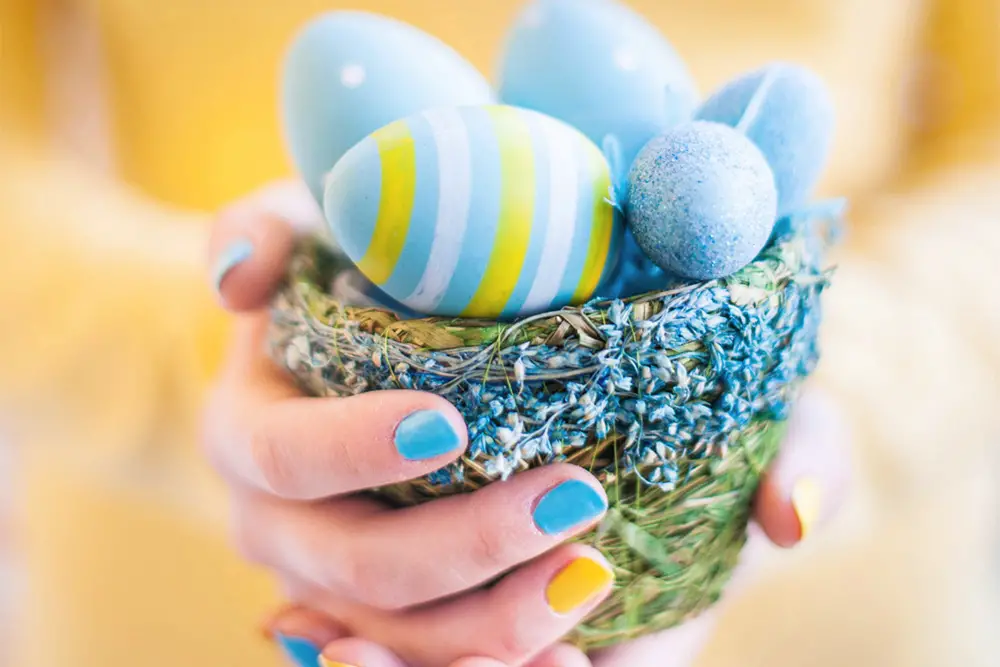
Easter Nail Designs-1
Average Application Time – 50 minutes.
Ingredients – Glitter, white coat, light pink coat and a light base coat.
The Steps
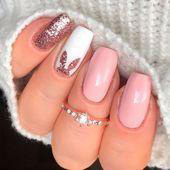
Top on our list would be these appealing easy nail designs, that look stunning and appealing at the same time. You will need some acrylic nails if you want to pull off this look, and try to complement it with some jewelry.
Start by applying a unique glitter finish on your pinky nail nail. Next, apply a white coat on your fingernail, and a light pink coat on the remaining nails. Finally complement this look with a clear and light base coat for an appealing finish.
Easter Nail Designs-2
Average Application Time – 50 minutes.
Ingredients – Flower decals, transparent acrylics and a light pink nail coat.
The Steps
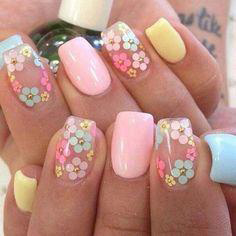
This next contender on our run down of the best easter nail designs is also exceptional. You will need stickers, and transparent acrylics for you to get this look right.
The first step is to set the transparent acrylics on top of your nails. Then, set some flower decals on your ring and pinky fingers. Next, proceed to complement this look by applying a light pink nail coat on your middle nails. The thumb gets a light blue paint coat, and pinky finger gets a light yellow coat.
Easter Nail Designs-3

Average Application Time – 45 minutes.
Ingredients- White paint coat, dotted paint patterns, fine tipped nail brush and nail glue.
The Steps
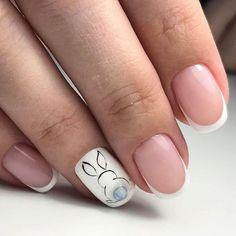
While this look seems easy to pull off, you have to be intricate with the details if you want to get the right results. Start off this nail polishing process by applying a white paint coat on top of your nails. Then, complement this look by applying dotted color patterns all over your nails.
To do this, you will need a paint brush that has a fine tip, and dip it inside different nail coats. Finally, set a bunny decal on your ring finger. VOILA. Your new and glamorous nails should be ready.
Easter Nail Designs-4
Average Application Time – 1 hour 30 minutes.
Ingredients – Short tipped acrylics, rabbit stencil, nail glue and light pink nail polish.
The Steps
Taking things to the next level would be this unique nail art design, that is simple to apply on your nails. It’s the perfect nail art design for early morning or late at night when relaxing to some of your favourite tunes.
For this look, start by setting acrylics on all your nails. However, for the ring finger, set a white paint coat over it. Then, apply a unique binny stencil to complement the overall finish of the look. Finally, finish out this look by applying a light base coat on top of your nails.
Easter Nail Designs-5
Average Application Time – 1 hour 10 minutes.
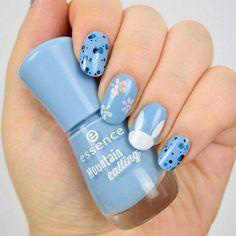
Ingredients – Light blue nail polish, rabbit stencil, short tipped acrylics, and black nail polish.
The Steps
Our list of nail art designs would not have been complete with this unique bunny look. To pull this off, you will need curved tip acrylics, flower and bunny stencils. The first step would be to apply the transparent acrylics on top of your nails. Then, apply a polka dot design on your pinky finger, using a pointed tip brush.
However, for the ring finger, set a unique bunny stencil and a flower stencil on your ring finger. The pink and thumb fingers also get the polka dot finish you had applied earlier.
Easter Nail Designs-6
Average Application Time – 50 minutes.
Ingredients – White short tipped acrylics, yellow nail polish, black nail polish and nail glue.
The Steps
Here is where you will also have to leverage your attention to detail in applying nail color designs. Start by setting some acrylics on all your nails. Start by applying the light pink finish on your thumb, then light purple for the pinky, white for the middle finger, and yellow for the ring finger.
Finally, complete this painting process on your pinky finger by applying a light purple paint coat. Next complement this look by applying a polka dot finish on your nails, and ensure each has a varying consistency.
Easter Nail Designs-7
Average Application Time – 40 minutes.
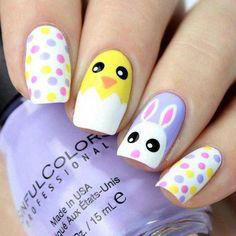
Ingredients – Short tipped acrylics, nail glue, face stencils, and different colored templates.
The Steps
Again, we finish out this list with this unique nail art design. It involves a thorough attention to detail, and time on your side.
Start out this look by applying a white paint coat on all your nails, except the ring finger. For the pinky finger, apply a polka dot finish, which includes yellow, grey and light purple. For the middle finger, apply a white paint coat, and then complement it with a unique cartoon face design.
Nextp proceed to the ring finger, and apply a light purple paint coat. Complement this look with a unique bunny decal. Finally, apply the polka dot finish you had applied earlier, to your pinky finger.

- Crochet Braid Hair Cost: Hope for a Style to Slay!! - January 9, 2024
- Best Braid Pattern For Crochet: Hair-Styling Tips And Tricks - January 3, 2024
- How To Braid Hair For Crochet: Best Hair-Styling Tips! - December 26, 2023