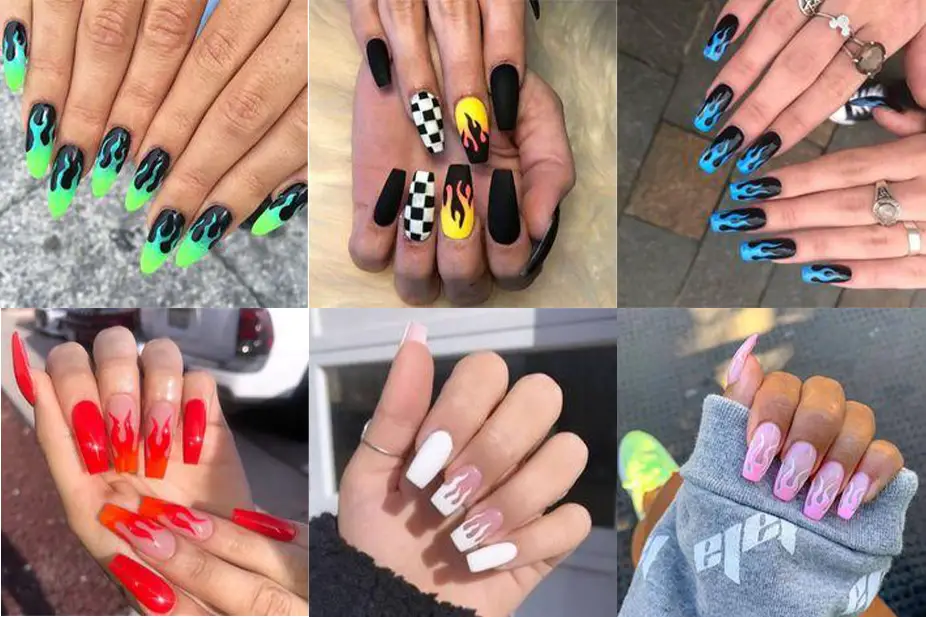
We all know flames for the various purposes they serve in our lives. Flames are symbols in our lives, and it’s why you will often come across art containing such designs. However, pulling of a flame look on surfaces such as the nail is not often easy – especially without any guidance.
So, we take a look at 9 exemplary flame nail art designs.
These flame art nail designs provide an in-depth run down of some of the best designs you can try out. The good thing is just a list you can use as a guide, and you are free to get creative with things.
1. Blue Flame Nails
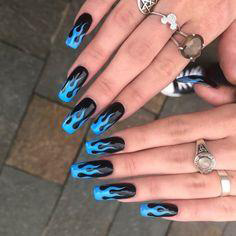
Blue flames exist, and you can have them sitting on your nails with the right guidance. For this nail art, you will have to start by cleaning your nails using some disinfectant. Then, set some acrylic nails of the nail structure.
Next, apply a flame stencil above the structure of the nail. Next, apply some light blue nail polish over the stencil, until it produces a flame art design. Let it and dry for a few minutes. Consider complementing this look with some jewelry on your nails.
2. Pink Flame Nails
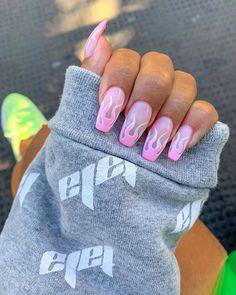
Next on this list of flame art designs would be the pink flame nails. These flame nails are easy to produce, and perfect for the summer months. You will have to get acrylic nails to pull off this look.
As usual, start by disinfecting your nail so that it’s clean. Then, apply some nail glue and set light pink acrylics over them. Then, place a flame stencil on the nail tip, and apply some light purple nail polish over them.
3. Light Yellow Flame Nails
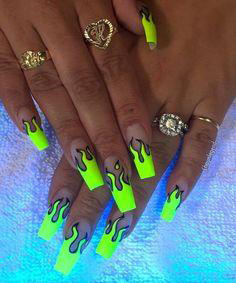
For a standout look, that will even impress your mates, try out this light yellow flame nails design. Since the luminous is bright, you may have to balance the look out with some clear nail polish.
Start by placing the acrylic nails of your nail beds. Then, apply some luminous green paint over the stencil. Then, let it sit and dry for a few minutes for the best results
4. White Flame Nails
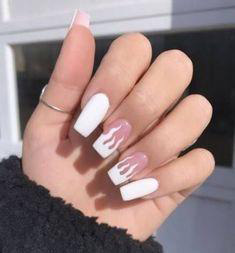
White has a unique appeal, but also communicates a laid back personality. For this nail design approach, you will go quite different with the patterning technique. Apply white nails on your thumb, index and pinky finger.
However, things will go a bit different for the index and middle finger. For these fingers, you will set a stencil over the tip of these two fingers. Then, apply some light white paint over them, and remove the stencils once the paint dries.
5. Black and White Flame Nails
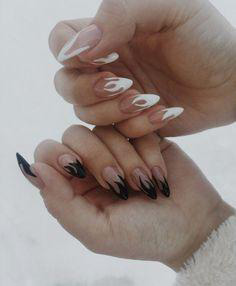
Yin and Yang often take up these two colours, and it’s a powerful symbol. Feel this sense of power by applying black and white nails on your nails. The good thing with this look is that it looks complex, but is relatively simple to apply.
You can start by applying some stainless acrylic nails over all your nails. Then, proceed to apply flame stencils on the tip of all your nails. However, the fingers on your right hand will get a black nail coat, while those on the left will get a white nail coat.
6. Orange Flame Nails

There is something rich and unique when you can pair exquisite nail designs, and some jewelry on your fingers. With this Orange Flame Nails design, you can easily achieve this look. Start by cleaning your nails, and then set some acrylic nails over each of them.
Next, set some nail flame art stencils over the tip of your nails. Since you wet for black acrylic nails, complement this look with some light orange nail paint for the best results.
7. Black and White Plaid Flame Nails
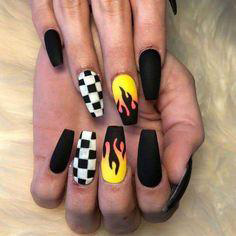
If you want your nails to look like you are going to shoot a movie, consider this unique black and white plaid flame nails. The best way to pull off this look would be to use stencils. Start by applying a dark black nail polish on your thumb, index and pinky fingers, on both hands. The black is important as it balances out this look.
Next set a checkered stencil over your nails. Then carefully, apply black and white paint over each hole, so that it has a checkered finish. For the middle finger, set a flame art stencil over the structure. Next apply some yellow flame paint on the base, and black nail paint at the tip.
8. Red Flame Nails
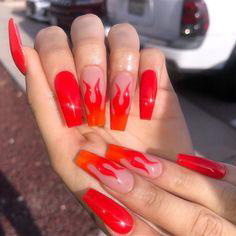
Red also looks exceptional on nails when done right. For this flame art design, you will need stencils for middle and ring fingers. However the rest of your nails will get a clear coat of red nail polish.
Plus, you will also need a clear nail base coat before pulling off this look. Finish it off by setting your nails under an LED light.
9. Light Green Flame Nails
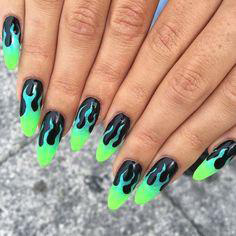
Clearly a unique variation of the luminous flame art design, pulling off this look is a simple process. You will need flame stencils, which you shall set over the structure of your nails.
However, you will complete the luminous flame art with some black nail polish. You have many other options in this category including balancing the look out with some dark green nail paint. Be careful not to spread the luminous green paint on your nails or cuticle section.
- Crochet Braid Hair Cost: Hope for a Style to Slay!! - January 9, 2024
- Best Braid Pattern For Crochet: Hair-Styling Tips And Tricks - January 3, 2024
- How To Braid Hair For Crochet: Best Hair-Styling Tips! - December 26, 2023

