So, you have finally taken the bold step to start trying out new nail designs and ideas. But, you still don’t know where to start, and are struggling for new ideas or techniques you can try. So, we take a look at 9 simple prototyping nail designs that are truly memorable.
These unique nail designs seem intricate, but you can still pull them off with a steady hand and some practice. Furthermore, you also need a few key resources for you to achieve the best results. These include acrylics, nail cutter sets, base coats, LED lights and various others.
Once you are well equipped, dive on right into these ideas, and express your freedom in creativity nail arts:
1. Artistic Square Nail Design
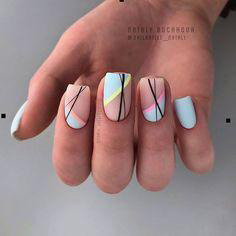
Average Application Time – 1-2 hours
Ingredients
Short Tipped Acrylics, Line stencils, Light pink nail coat, Light blue nail coat, Luminous green, and Black.
The Steps
This looks intricate but appealing at the same time? Well, you can pull it off, with the right accessories. For this design, you will need a total of four nail coats, and a stencil to divide your nails into specific sections.
The first step is to set some gel nails on top of your nails. Then, set straight plastic decals on your nails, such that it divides your nails into random sections. Do this for the middle, ring and index finger. However, the thumb and pinky finger will get a light blue paint coat. Remember to complement the lines and sections on your nails using the luminous green or light pink coat.
2. Long Glitter Square Nail Design
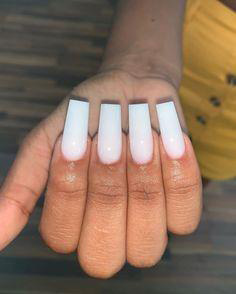
Average Application Time – 30-50 minutes.
Ingredients
White long tipped acrylics, clear nail polish coat and LED light.
The Steps
If you are looking for a laid back and pronounced look, try out this long glitter square nail design. While it involves the use of long acrylics, go for the types that have a straight tip. First, start by setting the long acrylics on top of your nails.
Next, apply a light coat of stainless nail polish, and then let it sit under an LED light as it cures.
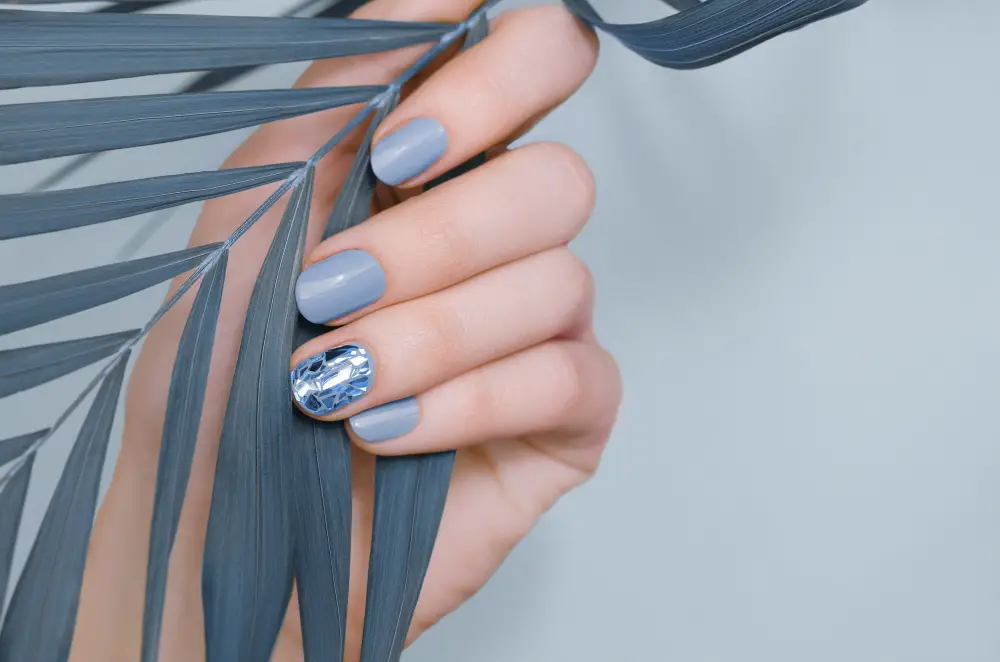
3. Gray Square Nail Design

Source: Beautybigbang.com
Average Application Time – 1-2 hours.
Ingredients
Light grey long tipped acrylics, LED and Clear nail polish coat.
The Steps
If you are looking for a unique way to boost your wardrobe, but still communicate a sense of calmness, consider this unique light grey nail design. You will need light grey acrylics for this look, the long types particularly. The long acrylics are excellent because they help balance out the use of a single colour, without stickers or a gradient.
Once you set the light grey acrylics on your nail, complement the design using a clear coat of nail polish. Then, let it sit under an LED light for the best curing results.
4. Short Ombre Square Nail Design
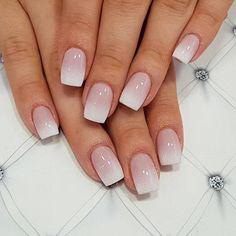
Average Application Time – 1-2 hours.
Ingredients
Ombre acrylic nails, nail glue, LED and clear nail plihs.
The Steps
Your nails can still look stunning, even if you don’t have skills in setting stickers, or even applying nail coats. For this nail design, you will need straight tipped nails. Start by cleaning your nails using some disinfectant.
Then, proceed to set the acrylics on top of your nails. The final step is to complement this look with a clear nail paint coat for the best results.
5. White Glitter Square Nail Design
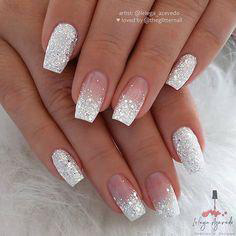
Average Application Time – 1 hour.
Ingredients
Short tipped acrylic nails, silver glitter, and ombre nails.
The Steps
Doesn’t glitter always look exceptionally stunning? You can look good today when you have this white glitter square nail design template. It involves applying glitter nail paint on your nails, and a unique light purple acrylic.
The first step is to set the light purple acrylics on top of your middle and ring fingers. Then, apply a powdered glitter finish to the top section of these nails. For the index and pinky finger, apply a silver glitter finish on top of the nails. Let it sit for a few minutes as it cures.
6. Purple Square Nail Design

Average Application Time – 50 minutes
Ingredient
Dark purple nail paint, light pink nail paint, light purple glitter and some stencils.
The Steps
This list of prototyping nail designs would not have been complete without this purple square nail design. If you want to produce this look on your nails, you will need a navy blue coat, a light pink paint coat and some glitter.
Start by applying the navy blue coat to all your nails except the middle finger. For the middle finger, apply a light pink paint coat. Then complement it with some navy blue and glitter on the sides.
7. Burgundy Square Nail Design
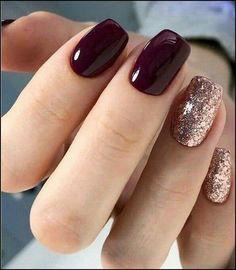
Average Application Time – 1-2 hours
Ingredients
Short tipped acrylics, and maroon glitter.
The Steps
We also recommend this simple but unique burgundy square nail design. It involves square tipped acrylics, burgundy nail coats and glitter. Start by setting the acrylics on your nails. Then apply the burgundy paint coat to your thumb, index and middle fingers.
However, the ring and pinky finger get the burgundy glitter paint. Complement the nail paint with a clean nail polish coat for the best results.
8. Orange Square Nail Design
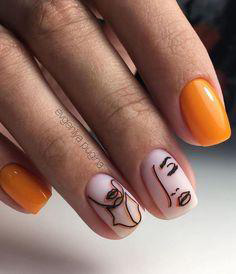
Average Application Time – 1 hour
Ingredients
Orange nail coat, face stencil and clear nail coat.
The Steps
Decals and nail paint are unique when used the right way. For this look, you will need a light orange nail coat, and some facial decals. Start by applying the light orange coat on your pinky, index and thumb fingers. And, you don’t need acrylics for you to complete this look.
The next step is to set the facial decals on your middle and ring fingers. Be careful in applying these decals to avoid compromising the finish on your nails.
9. Rainbow gradient Square Nail Design

Average Application Time – 1 hour
Ingredients
Multi-colored acrylic nail set, nail glue, and nail disinfectant.
The Steps
The simplest nail design on our list would be this multicolored design, which involves the use of acrylic nails alone. You don’t need nail paint to pull off this look.
Since it’s likely to sit on your nails for a long duration, start by cleaning your nails first. Then, set the different colored acrylics over all your nails. Complement the nail design with a clean nail paint coat for the best results.

- Crochet Braid Hair Cost: Hope for a Style to Slay!! - January 9, 2024
- Best Braid Pattern For Crochet: Hair-Styling Tips And Tricks - January 3, 2024
- How To Braid Hair For Crochet: Best Hair-Styling Tips! - December 26, 2023