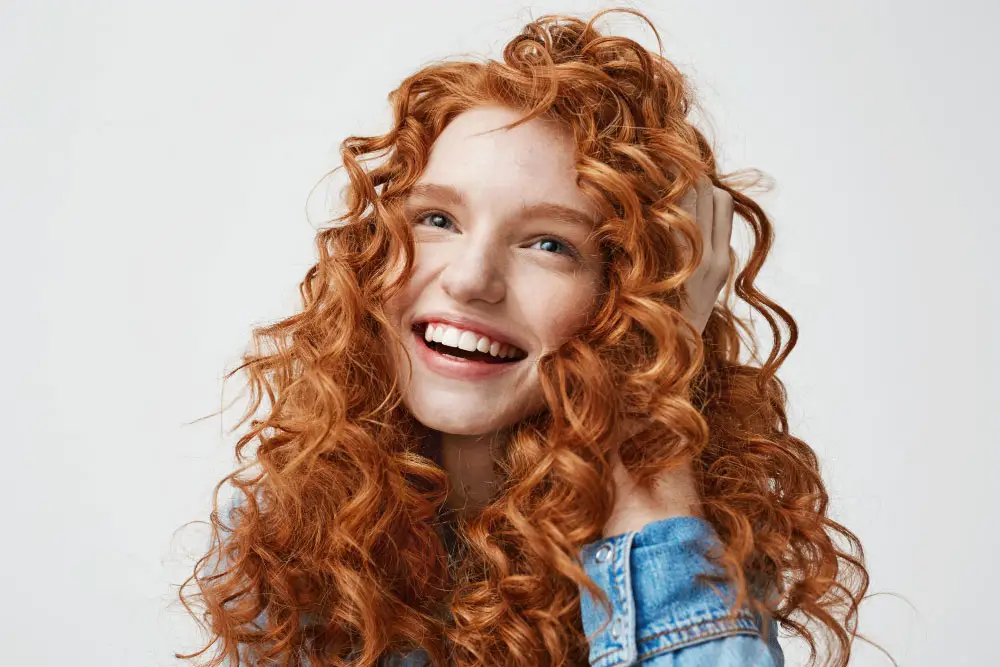
If you have naturally curly hair, your curls will look smoother and more defined when wet. They look pretty different when they’re dried. Your curls will be more prone to frizz when dry.
That’s where plopping comes into the picture. Plopping involves tying curly hair up in a T-shirt or towel. This way you can keep it from frizzing up. Using plops is a quick and simple way to achieve lovely, bouncy curls!
Want to plop your curls right away now? Well, for your convenience, we’ve described the process here to help you.
Let’s dive into the whole article to know about plopping!
How to Plop Your Curls? [Step-by-Step Instructions]
Step-1: Use Conditioner on Your Hair
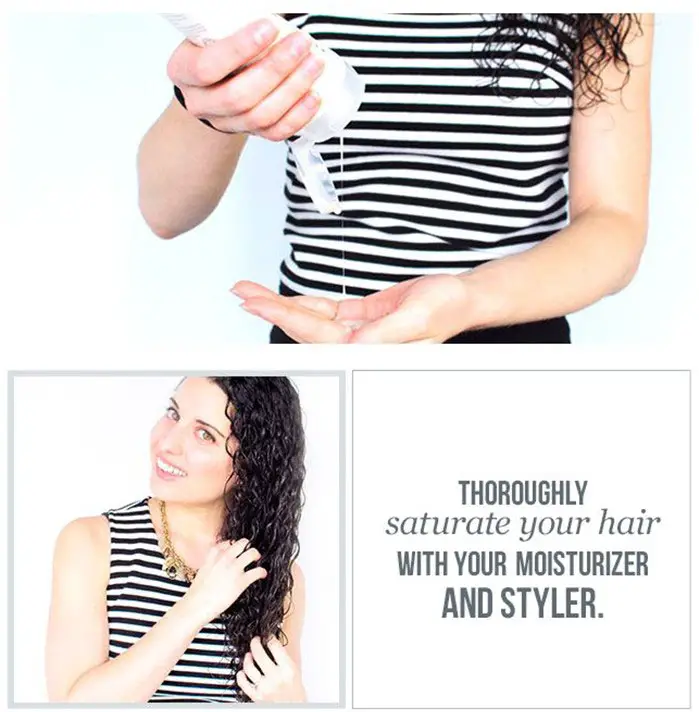
Wet your hair first. Because your hair has to be clean before doing anything.
Now, apply your preferred hair product to your wet hair. Work your way down the lengths. Using your preferred conditioner or cream is two options for defining curls.
Remove any remaining water from your curly hair afterward. Do it by lightly blotting it with a microfiber or jersey cloth.
Note: Check out and apply the conditioners or hair creams that are prefered for curly hair. You can ask for help from an employee of the salon you go to.
Step-2: Get a Towel or a T-shirt
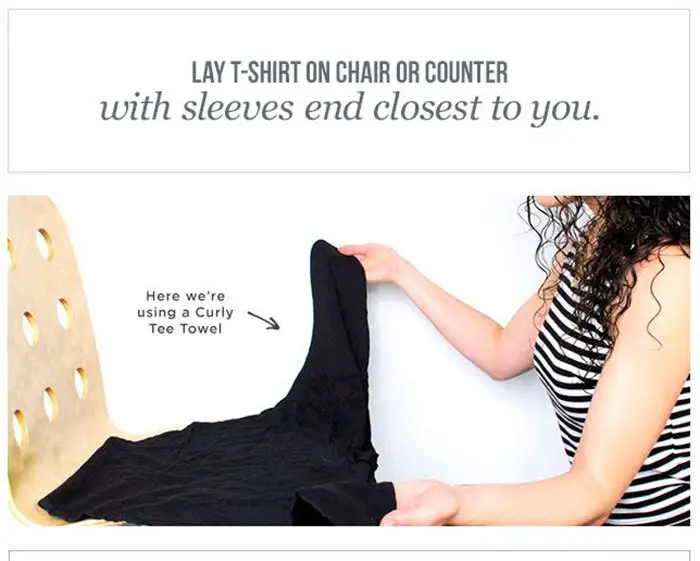
The plop method does not require the purchase of any specific scarf or towel. So, you can use a large and long-sleeved t-shirt from around the home.
Remember, to avoid frizz, you must pick a gentle substance that will not irritate your hair. If you don’t do this, you will not see the right results.
Step-3: Lay Your Fabric and Flip Your Hair
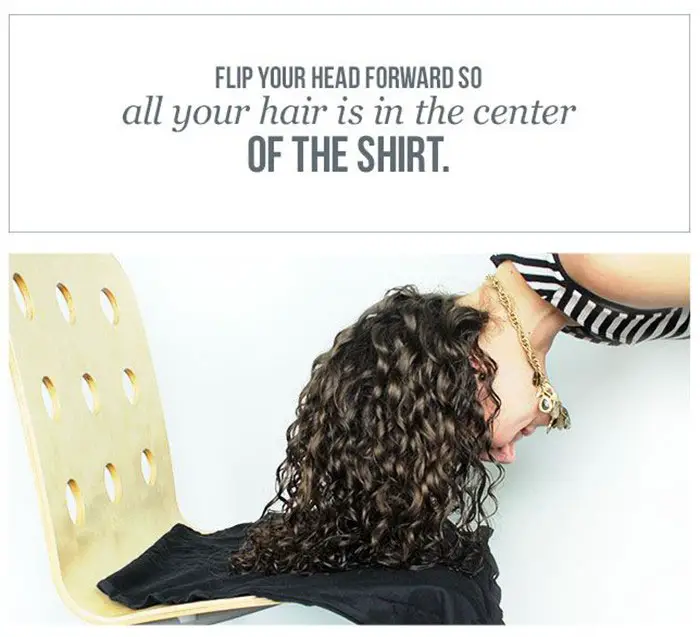
Lay your fabric out on a flat surface. For example, you can lay it on your bed, and iron it if necessary. Remember, the sleeves of your long-sleeved tee should be facing you.
Once you’ve done that, lean down and softly lower your hair onto the fabric. You should aim for the center of your hair while you’re doing this. Ideally, your curls will droop and drip onto the material as well.
Step 4: Wrap Your Hair
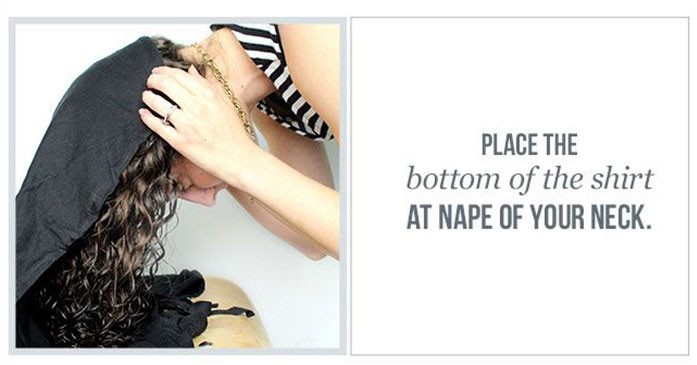
Wrap the fabric over your crimped hair once your crown makes touch with it. Fold the material’s back over your neck and pull it tightly. Then gather the cloth on either side. Roll it up a couple of times to make it suit your hair better.
Step-5: Tie Your Hair’s Knot
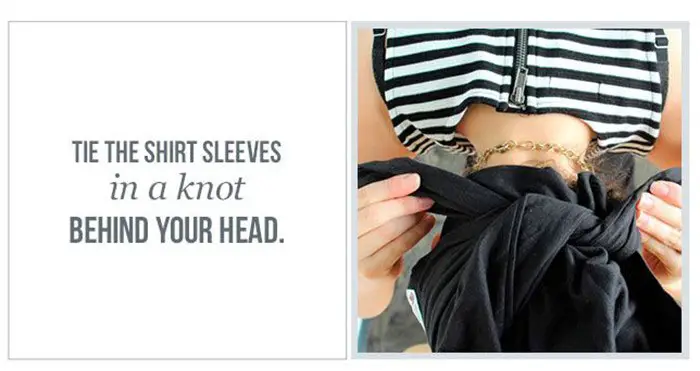
You’ll need to finish up all the loose ends now. Cross your arms behind your neck while holding onto each side (or sleeve).
Finish the knot by re-tying the hairs on your forehead. If there is any fabric hanging over the sides, tuck it in now. This way you can ensure it is secure.
Step 6: Leave Your Hair to Dry
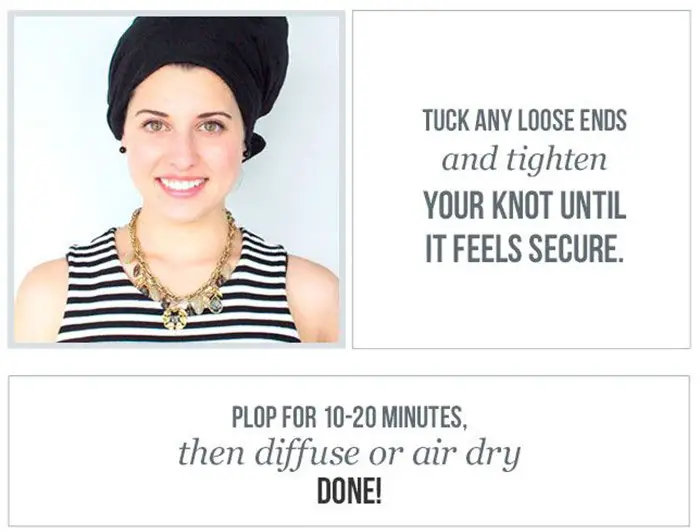
Allow your curls to set for at least 20 minutes for optimal results. Leave the t-shirt on for the night if you have the time.
When drying curly hair, a tight cloth compresses the curls for a beautiful shape. It does this without causing frizz. That’s it! Hair plopping is an experience you’ll never forget once you’ve tried it.
Plop your hair to save time and achieve gorgeous waves. With hair plopping, you can achieve lovely curls. These steps are surely going to help you.
Some Tips to Follow
Is It Harmful If You Sleep with Your Hair Plopped?
Nope! If you sleep with your hair in a plop, your curls will stay in place. Your hair will also not become frizzy if you move around a lot while you’re asleep.
Should You Brush Before Plopping?
It’s best to use your fingers to comb these through your hair. Because your curls will be wet as plopping is for damp hair only! So, with your fingers be sure to wring extra water from your hair before plopping it.
After Diffusing, Should You plop?
Yes, you can. Plopping is fantastic for both air drying and diffusing. Because it reduces the amount of time. You have to utilize heat on your delicate curls. You might want to diffuse more effectively the next time. In that case, start with a five-minute plop and work your way up.
Well, it’s time for us to go now, lovely ladies! But before that, we want to thank you for reading with us. We hope you’ve learned how to plop your curls right away.
Best wishes!

- Crochet Braid Hair Cost: Hope for a Style to Slay!! - January 9, 2024
- Best Braid Pattern For Crochet: Hair-Styling Tips And Tricks - January 3, 2024
- How To Braid Hair For Crochet: Best Hair-Styling Tips! - December 26, 2023