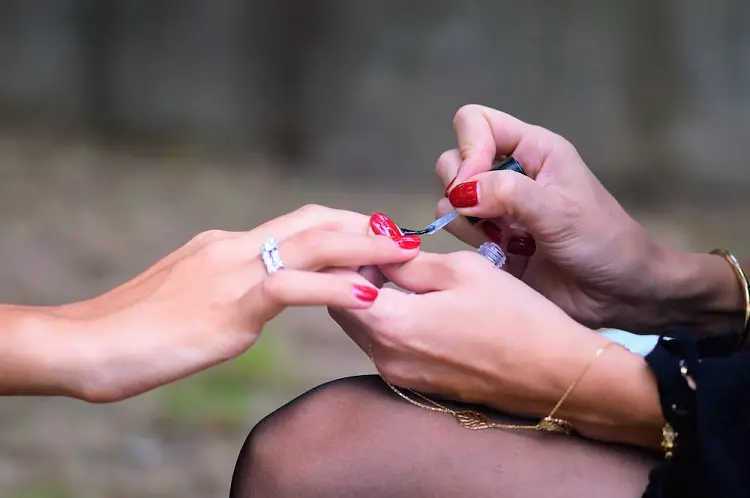
While nail stamping can be a unique approach to nail design, it also has challenges. One good example involves maintaining optimal hygiene during this process.
Its why you or any other nail art enthusiast might have asked, what is the best answer for how to clean nail stampers and stamping plates properly?
The best way to clean nail stampers and stamping plates properly involves various techniques or products. You must disinfect the tools, and clean all of their nooks and crevices correctly. Plus, you must also store it well.
Join us as we explore all you need to know about this simple but detailed nail hygiene process!
How to Clean Nail Stampers and Stamping Plates Properly
We identified all the relevant products, and steps you need for this process below:
Products Required
| Product | Description | Amazon Link |
| Acetone | A polish remover for breaking down any dried up nail polish in the nail stamper. | Pronto Acetone Nail Polish Remover |
| Cotton balls kit | For cleaning the deep sections of the nail stamping tool. | Amazon Basics Cotton Balls, 200ct, 1-Pack |
| Soft bristled brush | For the cleaning process. | The Laundress – Stain Brush |
| Nail stamping kit | It contains resources you can use to clean the deep sections of a metal or rubber plate and stampers. | Manicure Set Nail Clippers Pedicure Kit |
| Cotton Claw | Use cotton claws to hold the cotton. | 3 PCS Cotton Claw Manicure Saver Clean Nail |
| Stick lint roller | You need a lint roller as an alternative for jelly stampers. | Evercare BelleVie Extra Sticky Table Top Lint Roller |
Steps
- Start by preparing your nail care work surface.
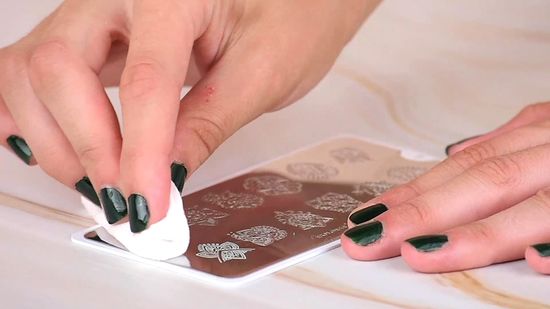
- Then, clean the excess dirt on your nail stamper or plate. Do this by cleaning it with acetone soaked cotton balls or paper towels. Be careful during this process, so you don’t miss any sections on the stamper.
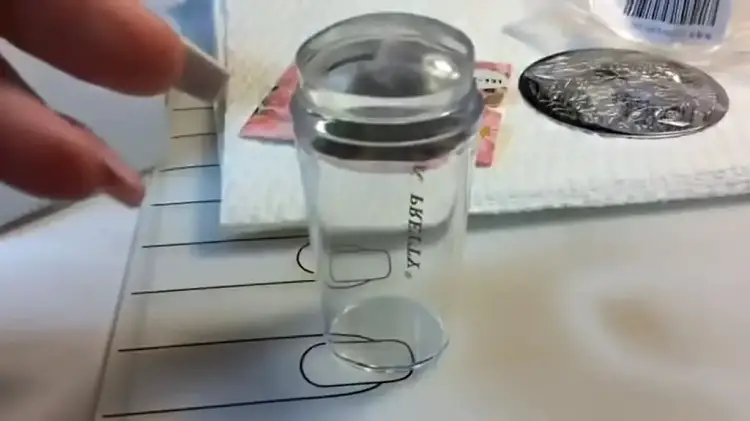
- Set the stamper in a container filled with some acetone, or any other disinfectant you can find. Doing this will help remove any nail stamping polish that has dried. Let your tool sit for a few minutes in disinfectant before you remove it for the next step.
- Remove the stamper from your disinfectant, and dry it using a cotton pad. Remember to get to all the “nooks and crevices” on your stamping tool. It’s crucial because dirt and nail polish grime accumulate in these deep sections.
- Rinser the stamper in a container with some water and salt. Ensure you remove all the soap and acetone from the stamper.
- Clean or pat it dry using a paper towel or a microfiber cloth. The latter tool is best because it works excellently for targeting all dirt forms.
- Set the stamping plates on a flat surface, and spray them using some disinfectant or nail polish remover.
- Store in a cold dry place, such as in a makeup bag or kit.
PRO TIP! This same process applies to cleaning both nail stampers and stamping plates.
Tips for How to Clean a Nail Stamper Properly
Here are the tips you need for cleaning a nail stamper the right way:
Tip #.1. Use the Correct Tools for Cleaning
Cleaning nail stampers and plates seems like a relatively straightforward process. However, using the right tools for this process has often challenged most nail art lovers.
One reason is that nail stampers and plates are prone to issues like staining, and polish pigmentation. Plus, they have several “nooks and crevices,” essential for setting polish designs.
However, these sections of the nail stampers also collect immense dirt, making it necessary to regularly clean your nail stamper head.
Any experienced nail product user will know the hassles of cleaning pigmented nail polish. You also need resources like disinfectants to help break down the nail polish.
Furthermore, resources like soft-bristled brushes might also be beneficial for the nail stamper cleaning process. You must also get quality stamping plates and stampers.
Tip #2. Use a Soft Bristled Brush for Stubborn Stamping Polish Stains
Have you ever been forced to use a stamper with stubborn stains? It probably ruined your polish’s base color or appearance over time, right?
A soft-bristled brush is excellent for cleaning nail stampers’ stubborn stains. That is because the surface of the brush works well alongside the disinfectant to break down the dirt.
It also gives a much better cleaning effect compared to using resources like soft cloths. You have two options for buying a suitable brush: a new soft-bristled brush or a toothbrush you are no longer using.
Tip #3. Store Your Nail Stamping Resources Correctly
While this seems obvious, you will be surprised at the many times you made mistakes in storing nail stamping resources. Here are some storage tips you might have missed:
- Store your nail stamping tools in a cool, dry place.
- Disinfect them before and after using nail polish removers like acetone.
- Avoid setting them alongside any other nail care tools you are using.
What is the Best Stamp Cleaner?
Here is a basic review of some of the best stamp cleaners on Amazon:
HiANNE Nail Art Cleaner Tool Case with Steel Wire Brush
We start this list off with the HiANNE Nail Art Cleaner Tool Case. It’s an all in one tool stamping kit that even features a steel wire brush. It’s also convenient to clean and features a powerful nail drill bit.
The HiANNE Nail Art Cleaner tool is also portable, making it perfect for different nail care applications. The entire set also features a cover that helps protect the brushes from elements like dust.
Pros
- Comes with a nail brit and two brushes.
- Compact sizes make it easy to carry and use.
- Features a cover that protects and improves the brushes’ longevity.
Cons
- It does not work well with excess nail polish.
Ranger WCS01690 Inkssentials Water-Based Stamp Cleaner
You will also be impressed with the Ranger WCS01690 Water-Based Stamp Cleaner. It is a non-toxic product that works well for many cleaning purposes.
The ink is also available in a 4-ox spray bottle, so you have more than sufficient ink for your needs. The ink also has a bubble gum-scented fragrance – making it perfect for indoors.
Pros
- Non-toxic ink compound is ideal for cleaning.
- It also has a scented bubble gum fragrance.
- The 4-ox spray bottle is sufficient for several days of stamping.
Cons
- Doesn’t work well with thick nail polish.
RANGER 2 Ounce Inkssentials Clear Stamp Cleaner
We could not help but mention the Ranger 2 Ounce InkEssential Clear Stamp Cleaner. It is the perfect stamp cleaner for clear acrylic and photopolymer stamps.
The stamp cleaner is powerful enough to remove water-based and water-resistant nail art inks. It also contains two fluid ounces, which are non-toxic and acid-free.
Pros
- It can remove both water-based and water resistant.
- The stamp cleaner is available in 2 fluid ounces.
- It is also a non-toxic and acid-free product.
- Works well for setting intricate designs.
Cons
- Might require a large stamper to cover the entire nail plate.
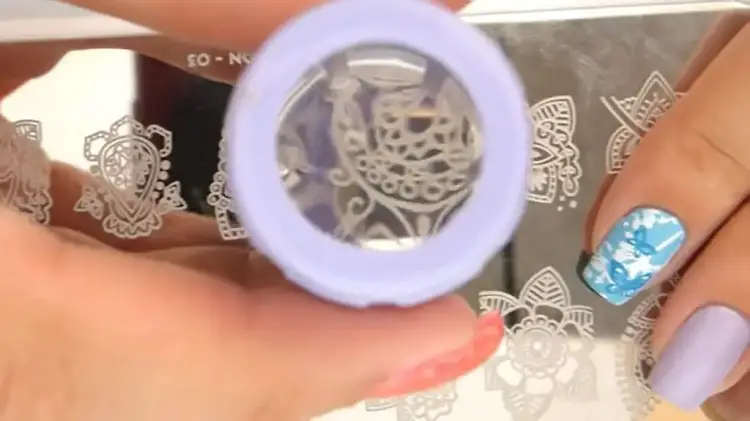
How to Make Stamps Sticky Again
You will probably run into this issue when using nail stamps. As usual, first, clean your tools using acetone.
We recommend adding a small amount of glue or nail adhesive to the back section of the stamps.
Doing this will improve the adherence of the stamper head and thus make them much more sticker. You will then smudge the glue on the stamper head using the same rolling motion as when applying nail art.
It’s easy to find nail glue online, and we have made a convenient product recommendation for you.
When using glue or adhesive, you must cover the entire back stamper head area. Be careful so it doesn’t get on the stamp design because it can compromise the stamp pattern.
Once you set the glue or adhesive, let your nails sit undisturbed for a few minutes. Doing this helps ensure the nails stick optimally and your favorite designs stay unique.
Ensure you also clean off the glue from the stamps each time. That is because the glue becomes challenging to remove when dry.
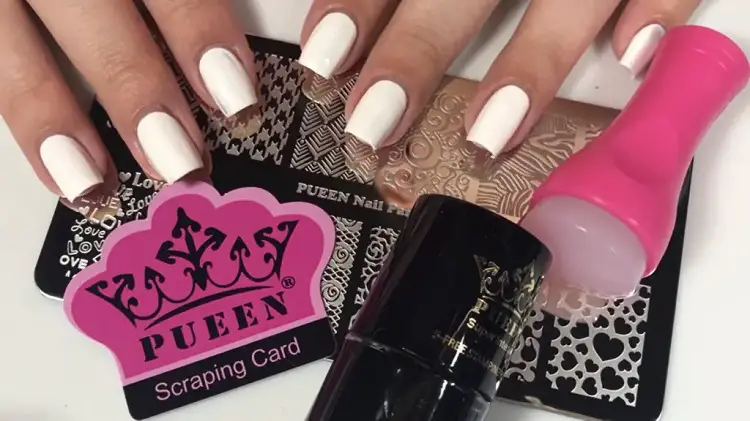
Items Required
| Product | Description | Amazon Link |
| Nail Glue | Use this on your stamper for nail art | 5 pcs KDS Nail Tip Glue |
| Manicure stamping kit | It contains tweezers, base coat nail cutters, a scraper, and cuticle pushers. | Manicure Set Pedicure Kit Nail |
Reasons for Cleaning Nail Stampers
Here are some main reasons for cleaning nail stampers
Reason #1. To Prevent Bacteria and Fungi Development
Clean nail stampers ensure your nails stay healthy after setting designs. You must clean your nail stamper regularly to help prevent various contaminants that can get to your nails. These include fungi, bacteria, and different other harmful organisms.
Plus, regular cleaning helps reduce the accumulation of dirt and grime on your nail stamping tools. It’s easy for nail stamping fungi or bacteria to spread to your nails when using contaminated stampers. So, it’s essential to clean them after each application.
Wipe any excessive polish or debris on the stampers using acetone. You might also have to use a soft-bristled brush to help remove the stubborn stains.
Reason #2. To Remove Any Surface, Residual Ink or Polish
Stampers are prone to accumulate residual ink or polish – which you “MUST” clean! The process of removing residual ink from the stampers has a positive impact on the quality of the printed image.
Ensuring the image is high quality is essential because it reduces issues like base polish smudging. Cleaning stampers also positively impact their longevity and reduces the need for frequent replacements.
Cleaning stampers between each application helps reduce nail polish color cross-contamination issues.
It’s a necessary process that prevents problems like staining and ensures you maintain clean and professional nails.
The colors often collect in the little spaces on your plates and stampers. They eventually develop into stubborn stains. However, cleaning your stamper regularly helps stop such issues.
Reason #3. To Keep the Stampers in Good Condition and Extend Their Life
Cleaning your stampers regularly helps improve their longevity and usability. That is because stamps are tools you will likely be using regularly. It makes them prone to dirt accumulation, especially in the form of smudged ink and regular wear or tear.
One of the ways to maintain them in good condition is to ensure you clean them after each stamping process. And you must also be thorough with the cleaning process.
Cleaning will prevent the stamper from experiencing clogging issues. It will also help avoid problems like the accumulation of dirt, moisture, and other elements.
Reason #5. For The Best Nail Stamping Results
Nail stamping is a multi-faceted process. One way to ensure the best results is to ensure your stamper is always clean. Doing this helps ensure the transfer of the designs to your nails is a simple process.
It also helps ensure the nail designs are free of issues like smudges or distortions. Clean stampers are also helpful in protecting designs from fading and breaking down over time.
Frequently Asked Questions (FAQ)
How Do You Clean a Stamper or Nail Stamping Plate?
There are various steps and solutions involved in cleaning a nail stamper. You must first soak the stamper in some pure acetone and then wash it gently using a tool such as an old toothbrush. You must employ a strategic approach to ensure you get to all the sections of the stamper.
How Do You Clean a Rubber Nail Stamping Plate?
Cleaning rubber nail stamps involves the same techniques as you would expect with normal stampers. First, soak the tool in pure acetone and clean it thoroughly using an old or soft-bristled toothbrush or a scraper. You can also use scotch tape with some acetone.
What Is Used in Cleaning a Stamping Plate?
Various resources help clean stampers. These include cotton balls, soft-bristled brushes, and a disinfectant such as pure acetone or nail polish remover. The aim should be to break down the polish and kill any germs. Apply a top coat of acetone after finishing.
How Do You Clean Stamping Jelly?
The best way to clean stamping jelly is to use resources like a CjS Sticky Pad or acetone. If the tool is dirtier than usual, use water and soap to clean it vigoruously. Avoid wiping the jelly stamper using any type of solvent, and use a paper towel instead.
How Do You Clean Nail Stamping Plates?
There are various techniques for cleaning stamper plates. Resources like soft bristled brushes, a scraper, and cotton balls can be helpful for this process. You must also get to all sections of the stamper plates to ensure the best cleaning results. Apply a top coat of acetone after finishing. Do it until it’s completely dry.
How Can I Make My Nail Stamping Plates Sticky Again?
There are various ways of making your stamps stick again. One method involves using a thin layer of glue, which you set on the back of the stamp. You can also dampen the rear section of the stamp using a cloth.
How Do You Clean Stamping Blocks?
There are various ways of cleaning stamping blocks that have dried polish. One method involves using a lint-free cloth or sticky lint roller with some disinfectant like rubbing alcohol. You might also need a soft-bristled brush or a scraper for the best results.
Can You Use Rubbing Alcohol to Clean Rubber Stamps?
Yes, it’s possible to use rubbing alcohol to clean rubber stamps. However, you must also be thorough with the cleaning process to get to all stamp sections. Using tools like soft-bristled brushes or a scraper is also crucial for the best results.
Should You Clean Stamps?
Yes, it’s necessary that you clean stamps regularly. Doing this helps prevent issues like the accumulation of dirt, dust, and bacteria. It also helps ensure you have a reliable tool for producing nail a stamp pattern.
Can You Use Baby Wipes to Clean Rubber Stamps?
Yes, it’s possible to use baby wipes to clean rubber stamps, especially those containing some disinfectant. You should do a few sweeps with up to three different baby wipes for the best results.
Cleaning nail stampers is easy when you have the correct information and tips. We compiled all you need to know about this process – so make sure you get through this guide to master all the details.
Let us know if you need any more info on this process!

- Crochet Braid Hair Cost: Hope for a Style to Slay!! - January 9, 2024
- Best Braid Pattern For Crochet: Hair-Styling Tips And Tricks - January 3, 2024
- How To Braid Hair For Crochet: Best Hair-Styling Tips! - December 26, 2023