Have you ever struggled with nail polish colours, that simply won’t last! Are you searching for an excellent way to have your nails looking good, without having to spend lots of time designing?
Well, these 9 long lasting and round nail designs should be the ideal solution for your needs. These nails designs are simple to apply, and guarantee several days of longevity. However, be careful when leaving nail products on your nails for several days.
The recommended time for leaving products on your nails would be two weeks.
1. Nude Round Nail Design
Average Application Time – 1 hour
Ingredients – Nail glue, light pink nail polish and a clear nail polish coat.
The Steps
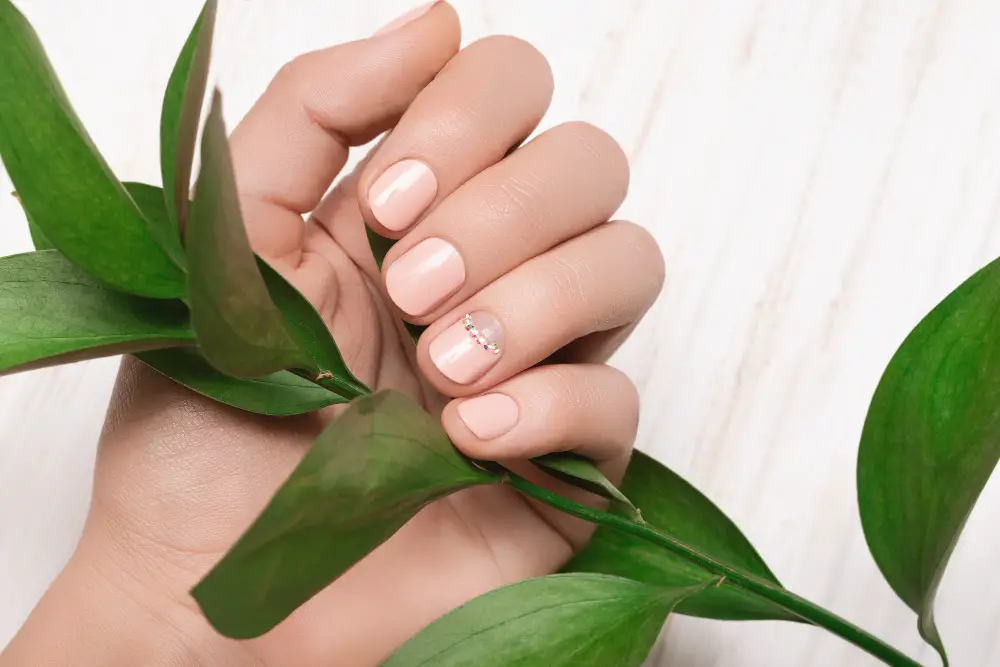
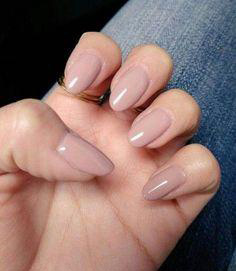
The top pick on your list would be this nude round nail design. You will need curved tipped acrylic nails to pull off this look. Start by applying the light pink acrylics on all your nails. Be careful in ensuring your nails can cure under the right conditions.
Furthermore, this nail design requires a clear coat of nail polish to ensure the finish looks appealing.
2. Colorful Round Nail Design
Average Application Time – 1 hour
Ingredients – Multi-colored nail polish, clean nail paint, and some nail glue.
The Steps
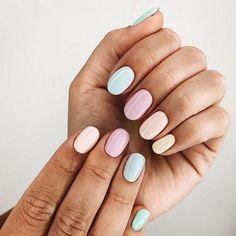
Next on our list would be this multicolored nail coat design, which also requires time and dexterity on your part. For this nail design, you need multi colorured acrylics, which you shall set randomly on all your nails.
Start by cleaning your nails, and then set the acrylics over them. Next, apply a clear coat of nail polish over your nails, and let them sit for curing purposes.
3. Marble Round Nail Design
Average Application Time – 30 to 40 minutes.
Ingredients – Short tipped acrylics, purple nail polish nail glue and a clear coat.
The Steps
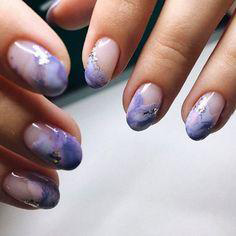
There is something simply appealing about marble, and it’s why such a material is common in most modern day homes. Achieve this look on your nails with marble painted acrylic nails and a light coat of clear nail polish.
As usual, start by cleaning your nails, and then set the acrylic nails on top. Next, apply a light clear coat of nail polish to make your nails appealing.
4. Mermaid Round Nail Design

Average Application Time – 50 minutes.
Ingredients – marine green stencil, nail glue, green glitter nail polish and an LED light.
The Steps
This list would not be complete without this unique Mermaid Round Nail Design. For this look, you will also need a nail green patterned acrylic, which you shall set on your nails.
Start off this process by cleaning your nails, and then set the light green acrylics on top of them. Next, apply a clear coat of clear nail polish to boost the finish quality on your nails. Let them sit for a few minutes for curing purposes.
5. Glitter Round Nail Design
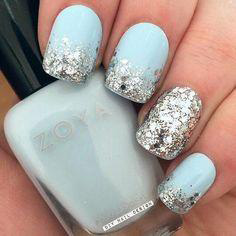
Average Application Time – 1 hour.
Ingredients – Grey glitter nail polish, light blue nail paint, nail glue and an LED light.
The Steps
Light blue and glitter can blend well when you have the right technique, and a steady hand. For this glitter round nail design. First is to clean your nails, and then set the acrylics on top.
Next, apply the light blue paint coat on all your nails, except the middle finger. Plus, ensure that you don’t apply the nail coat all through the nails. Leave the tip section for some glitter polish. For the middle finger, give it a complete glitter nail coat. Then, let it sit for the best curing results.
6. Flame Round Nail Design
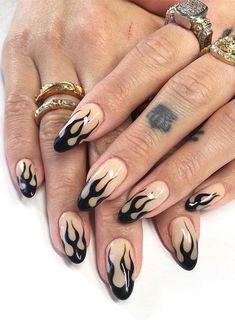
Average Application Time – 30 – 50 minutes.
Ingredients – flame stencil, light brown nail polish, some jewelry, a clear coat and an LED light.
The Steps
Doesn’t this nail design look simply stunning and creative? Well, for this flame round nail design, you will need curved tip acrylics to ensure the best results. Start by setting the curved tipped acrylics on all your nails.
Next, apply a unique fire decal on the top tip all the way through to the cuticle section. Then, apply a black nail polish over the decals. Remove the decals and let your nails sit under an LED light for curing purposes.
7. Pink Round Nail Design
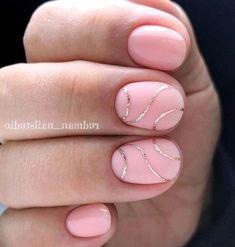
Average Application Time – 40 to 50 minutes.
Ingredients – Light pink nail polish, nail glue, glitter stencils and an LED light.
The Steps
Pink always looks simply stunning, and this is what you can expect from this pink round nail design. While you don’t need any acrylics or gel nails for this design, you have to be careful for the best results. Start this process by applying the light pink nail coat on all your nails.
However, the middle and ring finger nails will get a unique design. You will apply a unique glitter line finish on top of these nails. Then, finish the application process with a clear nail polish coat to make it appealing.
8. Burgundy Round Nail Design
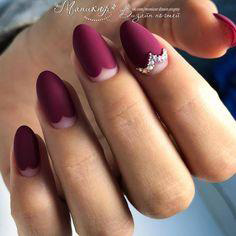
Average Application Time – 30 – 50 minutes.
Ingredients – Short tipped acrylics, nail jewelery and nail glue.
The Steps
Remember this unique burgundy round nail design, when you are out to try new things or expand your creativity. For this look, you will need gel nails, and a unique moon shaped stencil which you shall place on the cuticle section.
Start by applying the gel nails on the top half of your nails, such that the moon stencil leaves sufficient space for the paint. Then, for the index finger, apply a unique glitter nail design around the cuticle area, to provide a unique finish.
9. Water Decals Round Nail Design
Average Application Time – 30 minutes.
Ingredients – Short tipped acrylics, leaf stencils, nail glue and an LED light.
The Steps
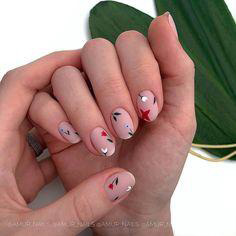
While this water decals round nail design appears simple, be careful in the application process to avoid staining the nail paint. Start this application process by setting light pink nail polish on the structure of your nails.
Then, set some leave stencils and a start decals over the structure of your nails. You have the freedom to get creative with things for this look, especially the type of colours you can use. Then, let your nails sit under an LED light as they cure.

- Crochet Braid Hair Cost: Hope for a Style to Slay!! - January 9, 2024
- Best Braid Pattern For Crochet: Hair-Styling Tips And Tricks - January 3, 2024
- How To Braid Hair For Crochet: Best Hair-Styling Tips! - December 26, 2023