If you want a new technique to make your nails look good this summer, try out some appealing nail designs. The list endless and this can make choosing the right one a challenge. However, this is also a good thing, because it means that making your nails look good might be easier than you think.
So, we have this in depth rundown for dark floral acrylic nail designs you should consider.
The list in this guide contains different nail art designs you should consider. You will definitely have fun playing around with these designs. And, you can also get creative with things. However, get ready to invest in different accessories to help ensure you get the right results;
How to Apply the Dark Floral Acrylic Nail Design
You will need a few resources, and to stick to a specific set of steps to ensure the best results. Let us get started:
| Product | Purpose | Product Link |
|
Acrylic nails |
To apply on your nails. | |
|
Clear nail polish |
To apply as a base cat for the nail polish. | |
|
Floral nail stencils |
To set designs on your nail | |
|
Nail strengtheners |
To help improve the strength of your nails. | |
|
Nail disinfectant |
To clean your nails from bacteria and dirt. | |
|
Nail glue |
To set up the stencil and acrylic nails. |
PRO TIP! Before using acrylic nails, practice caution to ensure the best user results. Avoid using products without gaining adequate insight into acrylics and maintaining optimal nail health. Done correctly, you will enjoy several years of reliable acrylic nail products use.
The Designs – Number 2 Should Impress Your Friends
1. Dark Floral Acrylics with Peach Red Flowers

Take a look at this unique nail art and design. It almost looks surreal right? WRONG! It’s entirely real and you can have them painted on your nails in a few simple steps. However, you have to be cautious so that you can pull off the final look the right way.
Stary by applying a dark black nail coat to all your nails, except the middle and ring fingernails. Then, paint a white coat on these nails, and let them sit for a few minutes. Then, apply some nail glue on top of your nails, and lay down the sticker to the surface.
VOILA! The process should be complete. Try and put your freshly painted nails under an LED light for the best curing results. The good thing about this design is that you can play around with the colours until you come up with a striking combination.
2. Laid Back Summer Nails

Make sure you also remember this unique nail art design, that sub-communicates a laid back attitude. However, it also achieves the right balance with unique floral designs, and a clear floral nail polish.
For this design, you will need some acrylic nails. Place them on your finger, and set them along some with some black nail polish. Here is where you get to spice things up : on your middle finger.
For your right hand, you will place a unique flower stencil on the dark black finish. However, for your other nail, you will place a clear acrylic nail. Then, proceed to complement it with a unique flow design. Remember to leave each stencil stably on your fingernails. Any slight movement of your stencils can easily compromise the quality of the nail polish and the finish.
3. High Quality Leave and Flow Nail Design

Our list of nail care products and designs would not have been complete without this nail pattern design. To apply it, start by setting black acrylic nails on all your fingers. Preferably, go for the types that have a matte black for a rich finish.
Next place some unique leaves and flower designs on the structure of your nails. Let them sit as they cure for a few minutes to ensure the best results. The good thing is that you don’t have to stay consistent with the patterns, and you can play around until you find something suitable.
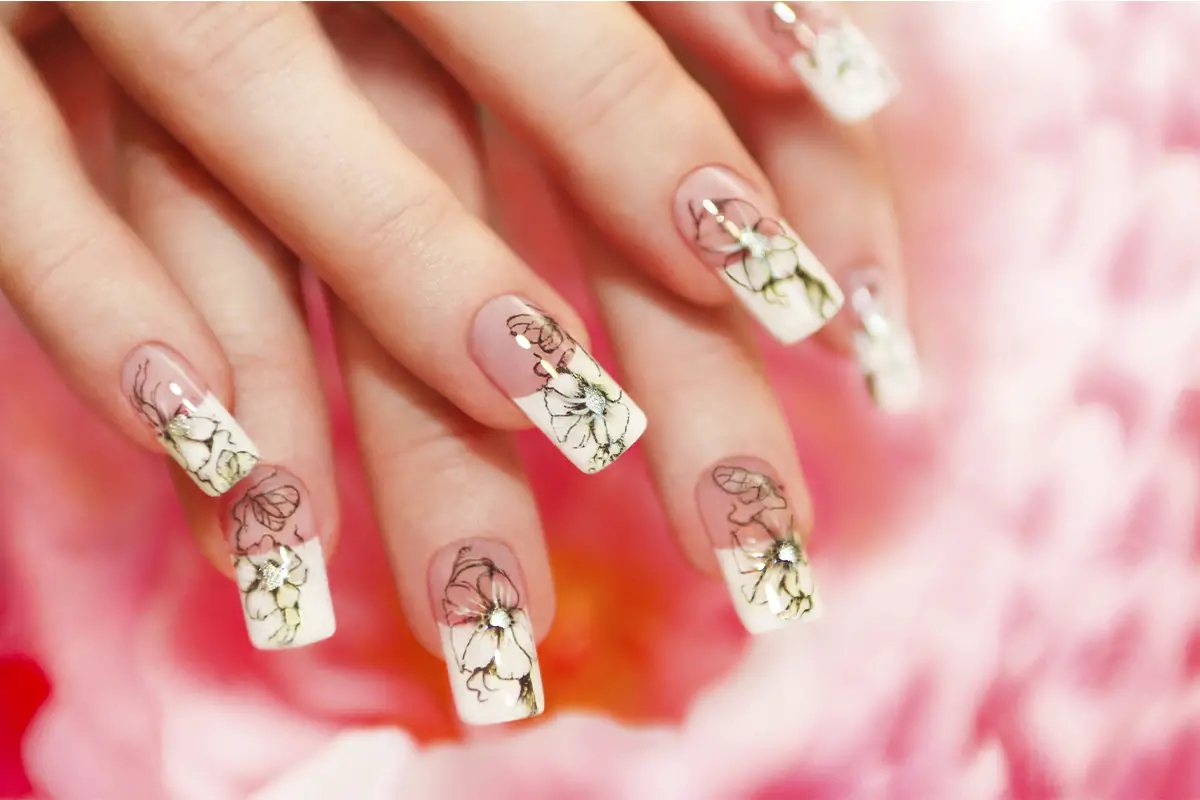
4. Black and White Print Flowers and Leaves Design

You are one step away from owning some of the most appealing nails that money can buy. Step out looking like a certified nail professional with this floral leaf and flower design. As usual, start by cleaning and strengthening the structure of your nail before setting the acrylics.
Next, proceed to place the acrylic nails over the top section of your nail bed. Once they are dry, place the flower and leaf stencils successively on each nail. Do this and then apply some white paint over the stencils for the best results.

- Crochet Braid Hair Cost: Hope for a Style to Slay!! - January 9, 2024
- Best Braid Pattern For Crochet: Hair-Styling Tips And Tricks - January 3, 2024
- How To Braid Hair For Crochet: Best Hair-Styling Tips! - December 26, 2023