Nail stamping is an “EPIC” technique for improving your nail’s appearence. That is because it lets you experiment with different designs and colors. However, there are various errors you can come across during this process.
Common nail stamping mistakes include failing to use the right tools, using the wrong polish, or using excessive pressure. You also must master nail stamping, which will require practice and patience!
This guide offers an encompassing perspective on all you need to know about this challenge:
- What are Common Nail Stamping Mistakes – From a Glance
- Common Nail Stamping Mistakes + Products for Solving!
- Mistake #1. Failing to Use the Right Tools
- Mistake #2. Failing to Use Right Polish
- Mistake #3. Excessive Pressure Use When Stamping
- Mistake #4. Failing to Use a Protective Top Coat
- Mistake #5. Failing to Clean the Stamping Plate
- Mistake #6. Using an Incorrectly-Sized Stamping Tool
- Mistake #7. Failing to Align the Design Correctly on Your Nail
- What is Nail Stamping? + How To It Correctly
- Our “2 Cents” On Nail Stamping Mistakes
- Here are Some Nail Stamping Youtube Videos You Watch
- Frequently Asked Questions
What are Common Nail Stamping Mistakes – From a Glance
We outlined the list of common errors here – (more juicy details for you in the guide below!):
- Failing to use the right technique.
- Excessive pressure when stamping.
- Failing to align the design correctly.
- Failing to clean the stamping tool.
- Failing to use the right tools.
- Using an incorrectly sized stamping tool.
Common Nail Stamping Mistakes + Products for Solving!
Here are the common nail stamping errors, plus some products you may need:
Items Required
| Product | Description | Link |
| Top coat | Use this to cover the nail art finish on your nails. | Beetles 2 Pcs 15ml No Wipe Gel Top Coat |
| Stamper kit | Use this to stamp the design on your nails. | PUEEN 35mm HD Chunky Transparent Soft Stamper |
| Nail polish | Use this to apply nail art polish to nails. | Modelones Gel Nail Polish Set |
| Nail Care Kit | contains resources like cuticle pushers and nail cutters. | Manicure Set Nail Clippers |
Mistake #1. Failing to Use the Right Tools
The wrong tools can lead to common nail stamping errors, which happen for various reasons. That is because this process requires a specific technique and resources to ensure the best results.
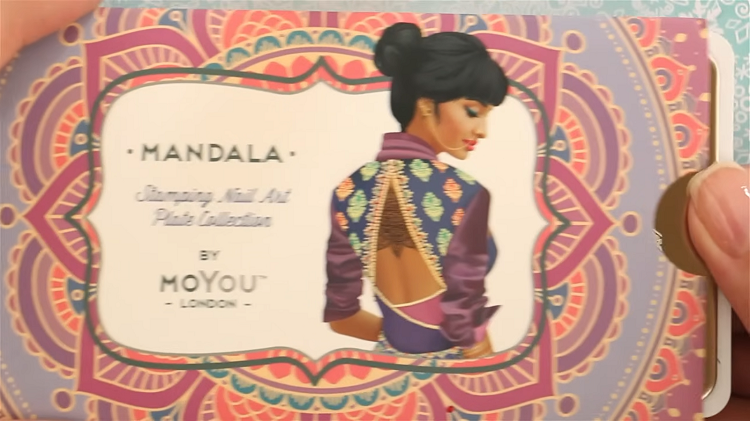
These include stamper heads, polishes, and nail stamping plates – below, we have included a guide on how to do nail stamping using the correct tools.
Solution
The solution here is simple – get all the right tools for your nail art needs including:
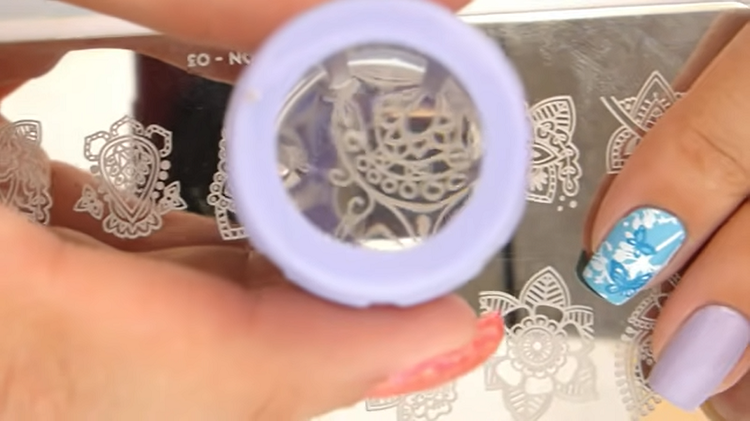
- You will need a stamping plate for nail art.
- A stamper for the designs, which usually has a soft structure.
- Third, you will need a scraper which you will use for designs. Doing this will ensure you find it easy to remove nail polish for nail stamping plates.
Mistake #2. Failing to Use Right Polish
Using the wrong nail polish when stamping can cause various complications. For instance, it can cause your designs to smudge, compromising the transfer process. That is that the right nail polish needs to provide sufficient adhesion levels.
Plus, overly thick polish can be challenging to use when setting nail designs. It might cause be difficult to set, and cause a mess. Poor quality polish can also have compromised longevity – especially if your lifestyle involves using your hands regularly.
Solution
Ensure you pick the best nail polish for nail stamping. Remember also to learn all about this approach to nail designs.
Mistake #3. Excessive Pressure Use When Stamping
Using excessive pressure can damage the nail designs and the quality. It also has various other drawbacks for your nail polish finish and health, including
- Overstamping causes uneven nail beds, which require time to heal.
- It can damage the nail plate and lead to breakage.
- The nail art polish might smudge and have a messy appearance.
- The stamping can produce an uneven and blotchy pattern
- It can cause the nail art to fail to adhere and have an unprofessional appearance.
Solution
Avoid using excessive pressure when stamping the design on your nails. Just be gentle enough for the design to set on your nail surface.
You might have to practice a few times before getting this process right. Try experimenting on flat surfaces first before setting the designs on your nails.
Mistake #4. Failing to Use a Protective Top Coat
A protective top coat is an essential resource for sealing nail designs. Without it, nail designs can’t guarantee longevity.
That is because of increased exposure to elements like the air and dust. It eventually leads to nail polish staining and possible cracks on the nail surface.
A protective top coat helps lock in the polish and ensures your nail art design has an appealing finish. Applying the top coat correctly is also vital for achieving results. It’s best applied when the nail design you stamped dries accordingly.
Solution
Invest in the best top coat for nail art designs (check the table above!). Ensure you use this product correctly after your nail stamps dry as required.
Mistake #5. Failing to Clean the Stamping Plate
Hygiene is important when using nail products!! We can’t “STRESS” this enough.
Nail designs might seem durable, but they can also be prone to various infections and hygiene issues. It’s why cleaning your nail stamping plate is a crucial process.
You must do it before and after your use stamping tools on your nails. Why is that?
Well, it helps cut the risk of hygiene-based infections by 99%. That is because you will use products like disinfectants to clean your nail products and surfaces.
Solution
We recommend you learn how to clean nail stampers and platers properly. Here are the steps:
- Prepare a small container filled with acetone solution.
- Get a soft-bristled brush and some cotton wool.
- Dip the container’s stampers, plates, brush, and cotton wall.
- Start cleaning them delicately until you get through all the dirt on your nail tools.
- Finally, store your stamping tool correctly.
Mistake #6. Using an Incorrectly-Sized Stamping Tool
There are instances when you might mistakenly use an incorrectly sized stamping tool. It happens to all nail art lovers – trust it’s normal.
Using a poorly sized stamping tool will produce a poorly finished design. Fortunately, correcting mistakes by replacing the ink pad and performing the restamping process once again is often easy.
Solution
Ensure you align the ink properly with the pad during restamping to avoid mistakes. Plus, you might often have to invest in new stamping tools for the best results.
Doing this ensures that you won’t repeat the same mistakes. Ensure you perform the proper steps to avoid making stamping mistakes. Some tips when using the stamping tool based on size factors include:
- Check the ink pad, and ensure that it’s well aligned and free of imperfections.
- Practice the stamping process first on resources like paper.
- Be patient when using stamping tools, as it can be easy to make mistakes.
- Research more on the different stamping tool sizes for your needs.
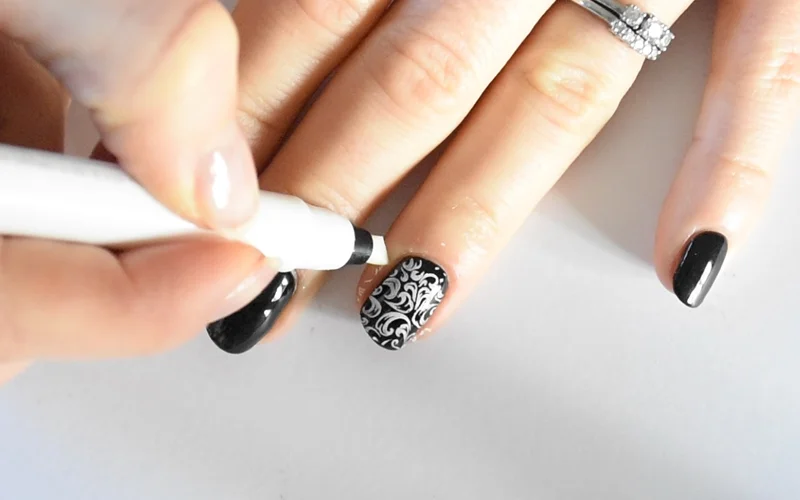
Mistake #7. Failing to Align the Design Correctly on Your Nail
Another common mistake people make when stamping tools are not aligning the designs as required. It’s an easy mistake to avoid by aligning the stamping tool with where you want the imprint.
Solution
We recommend the following steps for this process:
- First, ensure the design you pick sits centered on the stamping plate. Ensure it’s also the correct size (a common nail stamping mistake!) You can use a tweezer to adjust its position to suit your needs. You might also need a manicure if your nails are in poor condition.
- Once you center the design, get a stamper and use it to set the stamping design. Ensure you press firmly on the stamper, so the design transfers as required to the nail. You can also use a lint roller for this process.
- Once you complete the design transfer process, double-check to ensure the design is sitting as required. The design might sometimes be off, so get a brush and use it to customize the position of the design.
- Be patient in aligning the design to ensure you get the best stamping results.
What is Nail Stamping? + How To It Correctly
Nail stamping refers to a nail art technique involving the transfer of specialized designs to the nails.
It involves using a specialized tool for settings the designs and is a simple process to perform DIY. However, like all other nail care procedures, adequate practice and experimentation are required for the best results.
Here are these tips:
- Do a manicure. Cut them short, and condition them using a product like a nail moisturizer or a hardener. You might also have to buffer and file them for the best consistency.
- Doing this prepares your nails for several days of sitting under the nail designs.
- Get your nail stamping kit, and apply some nail polish to the stamping plate. Next, set the design on your nails and let it sit for a few seconds.
- Use the stamping tool to press the design to your nails before the polish dries.
- The final step is to seal the nail design using a nail polish top coat.
Our “2 Cents” On Nail Stamping Mistakes
While this approach to nail designs might be innovative for producing unique nail designs. However, even if it’s good to learn about the mistakes to avoid, we recommend you always focus on the positive side of things
With the correct tools and techniques (check above!), creating unique designs is simple. You can do it in minutes.
Focusing on your success as a nail stamper will help improve your motivation and inspiration to try new things. Heck – positivity is a major life hack!
Achieving results that make you proud also gives you a sense of accomplishment. This is particularly important if you are learning this skill as part of a nail salon career.
Focusing on your success will also improve your courage to take risks and explore different designs.
Your success with this technique will also enhance your ability to learn from mistakes. It also depends on your ability to perform the manicure procedures correctly. Try to also learn more about this process from other nail artists.
Here are Some Nail Stamping Youtube Videos You Watch

This is a bonus section for you, our valued reader. We researched the best videos on youtube detailing nail stamping mistakes and things you should consider.
We picked the videos on various factors other than just views and subscribers. These include the quality of information and the specific factors discussed. Here are these videos (packed full of tips!):
- Nail Stamping – Most Common Mistakes And Solutions
- Why your Stamper Isn’t Working 2021
- What NOT to do When Stamping
- 5 Things You’re Doing WRONG When Stamping Your Nails!
- Common Reverse Stamping Mistakes
Frequently Asked Questions
What Is the Trick to Nail Stamping?
There are various tricks to nail stamping. One of the best is to use a rolling motion to press the stamper onto the plate. Doing this will help ensure the design imparts correctly on the nail. You can also use tape to remove any stamped polish that gets to the skin.
Why Is My Nail Stamper Not Picking Up?
There are various reasons why your nail stamper might not be picking up. It could be because of designs that have etched areas, or your stamper might already have sufficient polish. You must check the stamper manually to ensure the best results.
How Do I Get My Nail Stamper to Work?
The best way to get your nail stamper to work depends on the reason for its damage in the first place. Before experimenting, you can clean the stamper first and test out new designs on flat surfaces.
Do You Top Coat Before Stamping?
No, you don’t use a top coat before stamping but use a base coat first for the best results. Once your design dries, apply the top coat to the surface of your nail. Cleaning it off gently using tools like nail polish removers is easy.
How Do You Stamp Without Smudging?
There are various ways you can stamp without smudging. You must use the right amount of pressure when setting the design, and avoid setting the stamper on the surface for excessive periods.
Can You Use Normal Polish for Stamping?
Yes, it’s possible to use normal nail polish for stamping. That is because it’s a high-quality product that won’t damage your stamping tools and is also reliable for application.
Making mistakes is an inevitable aspect of life, and nail art is no exception. If you are a novice, focus on improving your skills in creating nail art. If you are experienced, like a nail technician learns from your mistakes and keep on practicing!

- Crochet Braid Hair Cost: Hope for a Style to Slay!! - January 9, 2024
- Best Braid Pattern For Crochet: Hair-Styling Tips And Tricks - January 3, 2024
- How To Braid Hair For Crochet: Best Hair-Styling Tips! - December 26, 2023